Raw Carrot Cake
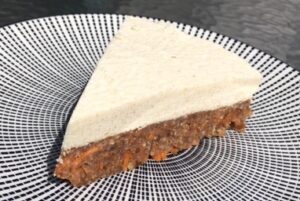
This raw carrot cake with cashew nut cream is pretty special! It has no sugar, gluten or dairy, which makes this cake super healthy and yet so delicious. Easy to make and tastes better, in my humble opinion, to a traditional baked carrot cake! Each bite is wonderfully rich and creamy, yet full of goodness. With a hint of cinnamon and a lemon twang in the vanilla icing, what’s not to like.
Servings: 12 slices
 Ingredients
Base
- 2 cups raw walnuts
- 1 cup unsweetened desiccated coconut
- 1/2 cup coconut flour
- 1/4 cup coconut oil, melted
- 2 tbsp lemon juice
- 2 tsp vanilla extract
- 2 tsp ground cinnamon
- 1 tsp ground ginger
- 1/4 tsp ground nutmeg
- 1/2 lemon, zest only
- 2 cups Medjool dates, pitted
- 2 cups carrots, finely grated
- pinch fine sea salt
Icing
- 1 cup raw cashews, soaked overnight (At least 8 hours)
- 1/4 cup unsweetened coconut milk
- 1/4 cup coconut oil, melted
- 3 tbsp maple syrup
- 2 tbsp lemon juice
- 1 tsp vanilla extract
- pinch fine sea salt
Method
Base
- Pulse the walnuts in a food processor until finely ground. Be careful not to over-process the walnuts. They should still retain some of their texture.
- Add the desiccated coconut, coconut flour, spices, salt, lemon zest, and pulse a few times to combine. Then add the coconut oil, lemon juice and, vanilla extract, and pulse to combine.
- Add one date at a time through the feed tube of the food processor while the food processor is running. The carrot cake mixture should be a little bit crumbly, but stick together when pressed in between your fingers. Finally, fold in the carrots.
- Press the mixture into a greased 6″ (15 cm) spring form. If you are using anything other than a spring form, line it with parchment paper for an easier removal. Place the carrot cake base in a freezer while you make the icing.
Icing
- Add the cashews, coconut milk, melted coconut oil, maple syrup, lemon juice, vanilla and salt into a high-speed blender. Blend on high until the icing is smooth and creamy.
- Remove the spring form from the freezer and spread the icing on top of the carrot cake base. Place the cake back into the freezer for about 4 hours to let the frosting firm up.
- Once set, remove the cheesecake from the spring-loaded pan. Serve it frozen or let it thaw at room temperature for 10-15 minutes before serving.
- Store leftover carrot cake in an airtight container in the freezer for 1-2 weeks.
Vegan Banana Bread
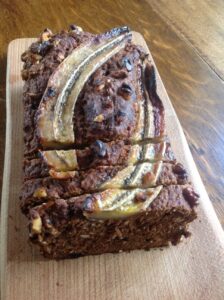
A lovely Vegan Banana Bread that is gluten-free, oil-free, refined sugar-free and wonderfully delicious.

Ingredients
- 3 medium very ripe bananas
- 2 1/2 cup rolled or porridge oats
- 1/2 cup coconut sugar
- 1/4 cup nut butter (peanut butter works well)
- 2 tbsp ground Flax or chia seeds and 6 tbsp water
- 2 tsp baking powder
- 1 tsp baking soda
- 2 tsp apple cider vinegar
- 1 tsp vanilla extract
- 1/2 tsp salt
- 1 tbsp cinnamon
- 1/3 cup walnuts
Method
Preheat your oven to 180c/350f.
In a small bowl, combine the Ground Flax OR Ground Chia seeds with 6 tbsp water to form an “egg.” Stir and set aside for 5-10 minutes.
Add 2 cups of the Rolled Oats into a blender or food processor and blend until they form a fine flour, about 45-60 seconds.
Place the Oat Flour into a medium sized bowl and add the Baking Powder, Baking Soda, cinnamon powder, remaining 1/2 cup of Rolled Oats, and Salt. Mix well and set aside.
Add your ripe Bananas to a separate, large bowl, and mash with a fork until they form an even, runny texture. Add the Nut Butter, walnuts, Coconut Sugar, Apple Cider Vinegar, Vanilla Extract, and Flax or Chia Egg to the bowl. Mix well.
Slowly incorporate the dry flour mixture into the wet Banana mixture, stirring well and until all clumps have dissolved.
Pour the batter into a parchment paper-lined or greased 8″ bread pan, smoothing the top off with a spatula.
Bake at 180c/350f for 60-70 minutes, or until the top is golden brown, and a toothpick comes out cleanly or with minimal crumbs. Remove from the oven and let cool for 10 minutes in the pan, then remove from the pan and allow to cool completely before slicing.
Store in a container at room temperature for up to one week.
Matcha Power Balls
Packed full of nutrients these little power balls will certainly give your energy levels a boost. Take some for a snack treat or pop a few in your lunch box. No added sugar but plenty of gorgeous tastiness. There’s natural sweetness from dates and a zingy kick by the lemon zest. This recipe makes 12 power balls.
Ingredients

- 1 tsp Matcha Green Tea Powder
- 4 tsp Pumpkin Seeds
- 3 tsp Hemp Powder
- 3 tsp Chia Seeds
- 4 Dates
- 1 tsp Coconut Oil
- 5 tsp Desiccated Coconut
- 1 Lemon Zest
- 1 Lemon Juice
- 2 tsp Crushed Pistachio Nuts
Method
Put all the dry ingredients and dates, except the pistachio nuts, into a blender and wiz until finely chopped.
Add in the lemon zest, juice and coconut oil and blend again until a fine paste.
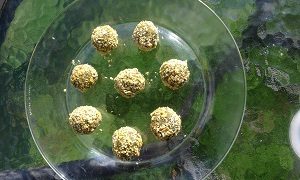
Squeeze into small balls and roll in the crushed pistachio nuts to finish off.
Pop them into the fridge and wait for them to firm up a little………Oh go on then, try one now!
Superfood Chocolate Brownies
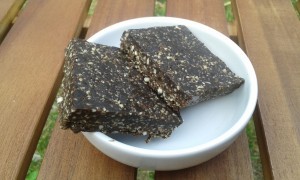
These brownies are so simple to make, taking just five minutes to create a healthy and delicious nutrient packed chocolaty treat. With no added sugar these brownies rely on the sweetness of dates to satisfy any sweet tooth cravings and raw cocoa (cacao) powder to add that chocolaty taste. Superfoods are so called because of their many health benefits and these brownies are loaded with them. From maca powder, a favourite of the ancient Incas in Peru for energy, wheatgrass, natures vitamin pill with anti-ageing properties, to cocoa powder with, among its many properties, the highest antioxidant levels of any food.
Ingredients

- 200g medjool dates
- 175g cashew nuts
- 4 tbsp raw cacao powder
- 2 tbsp maca powder
- 1 dsp spirulina
- 1 dsp wheat grass powder
- 2 tbsp coconut oil
- 2 tbsp chia seeds
Optional
If you really want to give these a ‘zing’ try adding 18 drops of wild orange essential oil to the mix. For obvious reasons it must be food grade oil and I highly recommend dōTERRA oils
Method
Crush the cashews in a food processor.
Add the pitted dates along with all the other ingredients and blitz until very sticky.
Scoop into a baking tray, press down firmly with a spoon or your hands then put the brownie into the freezer for about an hour.
